
 I buy a lot of card templates when Im in a hurry & I need ones for HS Senior grad announcements or Thank You cards but when I have time I love to make them from scratch. The one pictures to the left is one I made that's for sell on Etsy if you want to check out my Etsy store click the image or here. A lot of times I start off not really sure what direction I want to go with the design. You can easily find inspiration just by looking at elements like certain fonts will make me want to design something a certain way or Ill see a lace or watercolor brush that will inspire me.
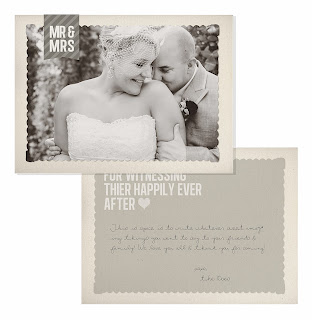
 When I first started designing cards I knew how to use Photoshop but I didn't know how to add the bleed guidelines or use clipping masks. In trying to find a good tutorial I came across one from Finally Friday but you can google how to use clipping masks & find lots of good ones or I posted mine below which covers all aspects of making a card from scratch. The hardest part (&its not so hard actually) is learning how to use clipping masks & understanding where to add your image in the layers panel. The tutorial is great at explaining it as simply as possible & helps you master these tools. The card above is a 5x7 flat card that I made for Thank You cards for a bride & groom. This templates available for sale on my Etsy store, click the image to visit. Ill also be posting free templates as I make new designs, so make sure to subscribe to this blog to get them as they come out.
Making a Card:
1. First & foremost you need to have basic user knowledge of Photoshop or this can all be very confusing. things you;ll want to know already include where the tools & layers panels are, how layers work in general, how to use the text & free transform tools & most importantly how to use Clipping Masks. Oh, & you'll want to actually have Photoshop or another Adobe program for graphic design such as InDesign.
2. The second thing is you'll need to start a small collections of Digital Papers if you don't already have some. I've included some below but you can google digital papers & find a bunch more easily. I recommend making a folder called design tools & sub folders labeled: Papers, textures, shapes, brushes etc. As your collections grows you;ll want to have it organized so you can find things easier.
3. Next you'll need Photoshop brushes & shapes. Brushes & shapes in Photoshop can be all kinds of awesome designs from flowers to arrows to vintage scroll banners. Make sure your getting high res files or else they will look blurry when you use them & also some brushes can only be used at very small sizes so try to check that when your downloading them. A brush is trickier to use then shapes are but there's a lot more options for brushes. They you especially want to get the high-res ones & not bother downloading any that aren't because they can often only be really small...too small usually...to use them for what you want them for or so has been my luck.
4. The last creative element you'll need is lots fonts. The basic ones that come on your computer are boring & overused. My only warning is seriously give yourself a time limit to look through fonts, don't spend a day downloading fonts, there's so many & its easy to get lost in them, I'm guilty! Here's some that I really like below. You'll also want to learn how to use font spacing & kerning in Photoshop to make more interesting designs. Pintrest has tons of great examples of this & you can google Typography for lots more examples & inspiration. Some sites for free fonts include Google Fonts & font garden. Here's some cool ones to get you started just click the picture to go to 'A Subtle Revelry's' Blog & download:

5. Also its important to note that you will probably be completely lost with what to do after you click the 'Download' button for these different creative elements if you do not have something that will unzip the files after its downloaded. You'll need Winrar or any other unzipping program, here's a link for a free trial to Winrar: Download Winrar
6. After the file downloads to your computer it should automatically open in Winrar, if not go to your computer, downloads & open it manually by selecting Winrar as the program to use when you right click the file. Once the file unzips you'll double click the main file (a lot of them come with usage terms & website links so look for the actual file). When you double click the Blue & White icon for the Brushes & Shapes it will automatically open in Photoshop. If it doesn't close Photoshop, open it again & re-check (or if you are Photoshop savvy find the little cog wheel icon in the Brushes, Shapes or Actions areas (they all have one). This is the settings, click it & select load Brushes/Shapes etc).
Here's a few links below to brushes & papers I like, just click the picture to go the site. Also check out Deviant Art & Brusheezy for lots of free everything (paper's brushes, shapes). Just type Photoshop Shapes or Photoshop Brushes, Textures etc. Free digital papers are easiest to find on Pinterest by searching "Free Digital Paper Packs", if you google this term it still pops up a lot of ones you have to buy which is fine but not free. Etsy has tons of beautiful paper packs from designers. Lastly check out Creative Market for modern & beautiful graphic design elements. Just want to mention again, make sure when you are looking & downloading papers & brushes that you download high-res stuff so it doesn't look blurry when you use it.


7. Ok, so now you have some Papers & Brushes & can get started making your own cards. The first step in Photoshop is to set your parameters. When you open Photoshop you'll want to select New instead of open. For whatever size card you are making you will always need to add you bleed area. Your bleed area ensures that as your cards or design is printed there wont be any white edges. It allows for printer error because your design won't stay right in the center of the printer & if it veers off course there need to be a little extra of the design to cover that space. So for a 5x7 card you would actually make the size 5.25" x 7.25" instead of 5" x 7" so you have the needed 1/4" bleed area around the edges for printing. Next you will need to add the ruler guidelines in Photoshop so you know where the end of your design is & where the bleed actually begins. You will want to extend the background into the bleed but keep any text or important parts of any images inside the bleed so they don't get cutoff.
Here's a video showing how how to make a card from start to finish: